Showing posts with label Impress Rubber Stamps. Show all posts
Friday, February 14, 2020

HAPPY VALENTINE'S DAY!

My Valentine cards for this year!  My inspiration was actually the polka dot envelopes that I found in my stash.  I wanted to coordinate the colors with the cute envelope.  

Products Used:  

Stamps:  Amuse Studio Essential Sentiments Too
Card stock:  XL Canson Watercolor card base & layer, Taylored Expressions Earl Grey, Pebbles Yours Truly Darling Patterned Paper (12x12)
Other:  MFT Square Stitched Dies, Impress Hearts Die, VersaMark ink, white embossing powder

And don't forget the pretty postage stamp!  


Wednesday, February 5, 2020

PIECES & PARTS

I had three of these Impress Succulent Shelf images stamped, colored & die cut with MFT Wonky Stitched Rectangles just laying on my desk.  I also had some fun backgrounds laying on my desk that I hadn't used yet.  You may wonder why so many things laying on my desk?  Ha, it happens!  So why not put the pieces & parts together?  I was pleased with the outcome.

Backgrounds:  Top Left:  Altenew Watercolor Stripes Stencil inked with white ink on Kraft card stock   Top Right:  Taylored Expressions Floral Fields Background stamp inked with VersaMark and white embossing powder  Lower Middle: Lawn Fawn Stitched Woodgrain Background Plate
Thursday, July 11, 2019

Succulents

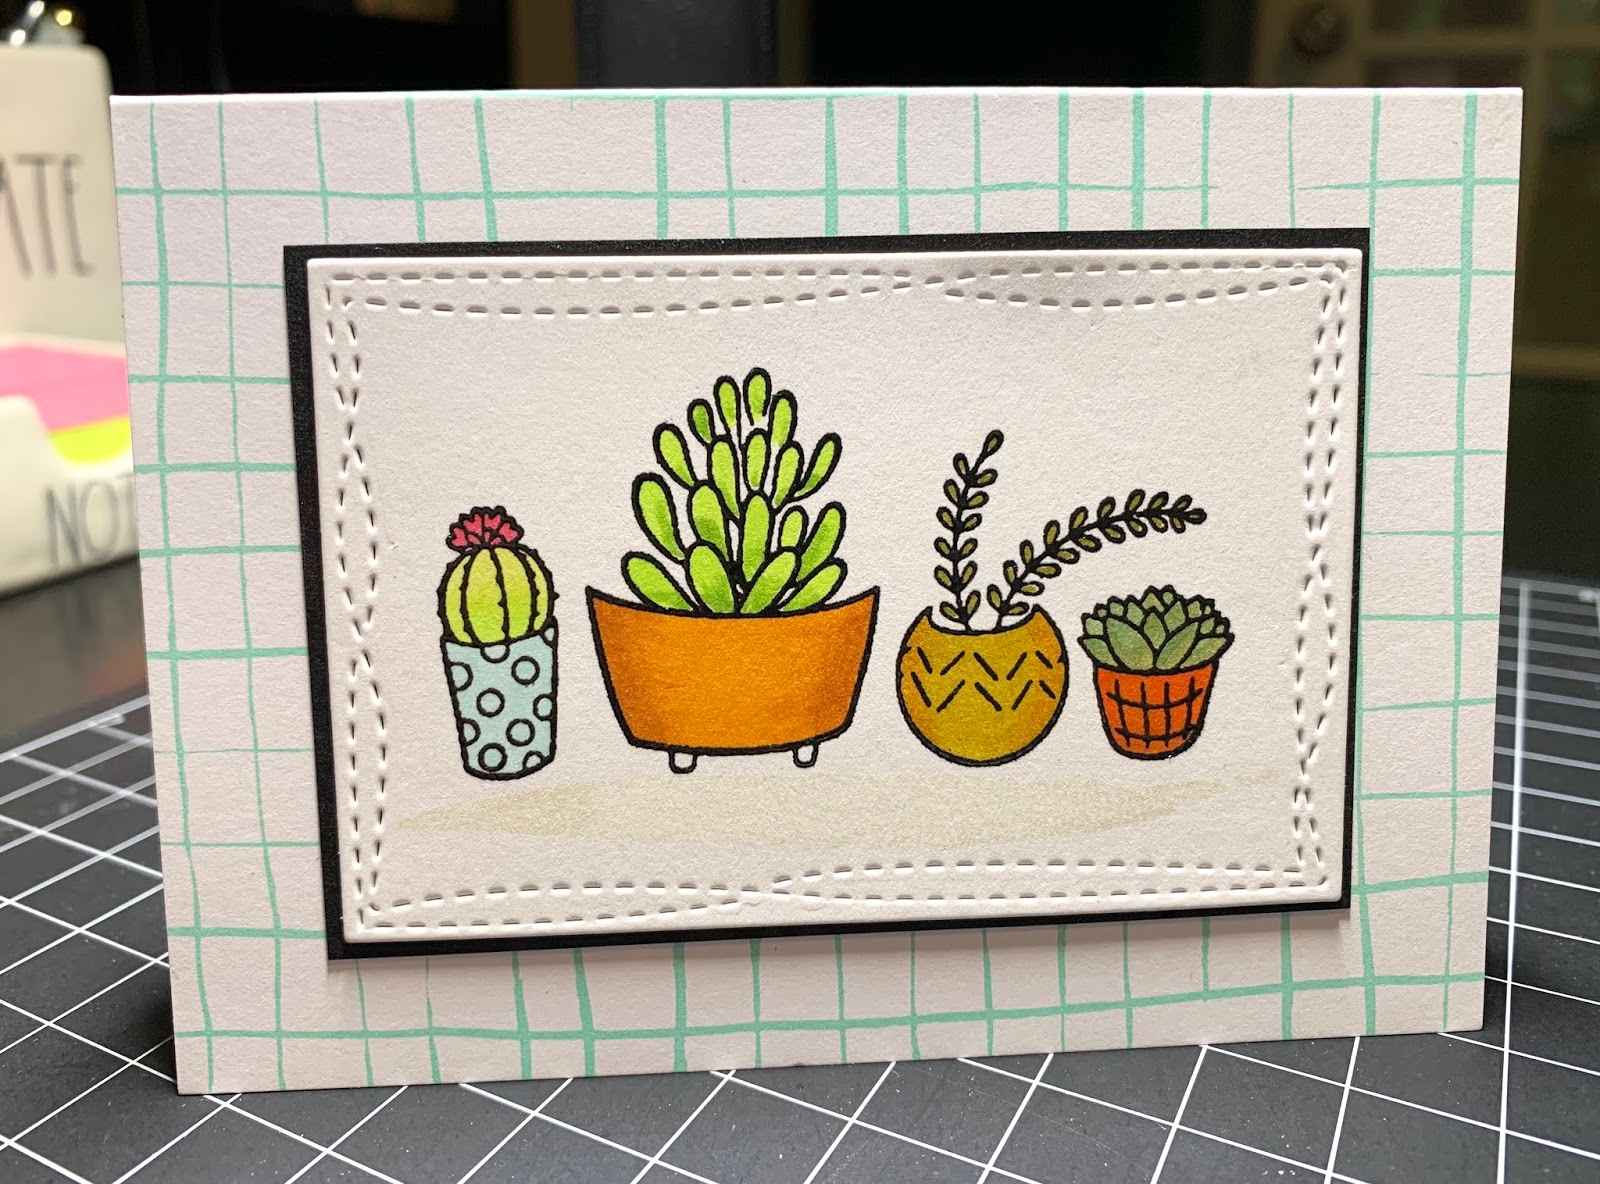
I'm a big fan of succulents both stamped & the plants.  The stamp I used is a wood block from Impress called Succulent Shelf.  I made a few cards using this stamp a few months ago and wanted to make a few more.  I used the Tim Holtz Brushstrokes stamp for the "ground" under the row of pots stamped in Amuse Studio Papaya ink.  I stamped the succulents with Onyx Versafine & added clear embossing powder.  After I stamped & colored the image with Copic markers,  I used the Linen Plate from PTI to give the white card stock some texture.  I die cut out around the image with a MFT Wonky Stitched Rectangle.  I sprayed the card stock with Sparkle Sheer Shimmer Craft Spray.  Unfortunately, it is hard to see in the photo but it adds a nice touch of shimmer.  I added the sentiment from EBE Punnies stamp set (isn't that funny?) and die cut it with MFT Planner Pieces.  I attached my card layer to a card base of EBE Woodgrain card stock.  
Friday, May 10, 2019

Succulents

Copic Coloring happening...
I really love succulent images - this was added to my cart recently when I ordered a few things from Impress Cards & Crafts.  It is an old school wood mounted stamp - which I still love by the way!  I did some Copic coloring and then die cut around the image with the My Favorite Things Wonky Stitched Rectangles.  I also used an image from Amuse Studio Brushstrokes to ground the row of pots.  Pretty quick and easy.  I believe the note card was a gift from a friend - thanks Doreen!  
Friday, May 4, 2018

Many Thanks

This card was inspired by Impress Rubber Stamps.  I saw a card they made & I recreated it with the stamps that I had in my collection.  I went old school and used wood floral stamps!  I stamped the background stripe with a stamp from the Papertrey Ink Ombre Builders stamp set.  I did order the Savvy Many Thanks die from Impress...which I love!  


Tuesday, April 24, 2018

Lesson Learned...

This card & photo was totally inspired by Cathy Z.  I CASE'd her card and even followed her photo layout!  I love her sense of humor on her Insta-stories and You Tube videos. Anyway, I saw a card on her blog and even though I didn't have the exact same floral stamp, this set Avery Elle Mother's Day worked just great!  Sometimes when you see a card you get all crazy and start filling an online shopping cart and then you realize you have something that would work just as well.  One of the things that I can't do without now that I have it all set up is my stamp binders.  Read my post about my stamp binders HERE.  I have every stamp that I own in these binders by category so that if I'm looking for a sentiment or a specific size or type of stamp, I can page thru one of the three binders.  It was a TON of work and took me hours upon hours to complete, but now that I have it, I use it all.the.time!  I highly recommend doing it - do you remember all the sentiments that you have in every stamp set that you own?  Neither do I, but I can easily go thru my binders and find things that I didn't even realize that I had in my collection.  It's been a wonderful reference tool in my ever growing collection!
I stamped on the rough side of the Tim Holtz water color paper with Onyx Versafine ink & clear embossed the image.  I used Zig Marker colors - Mid Green, Light Carmine & Carmine Red along with a water brush.  I did color a few leaves with Copics YG01 & YG03 since there was a lot of greenery on this floral stamp. 
This Happy Birthday die was tucked away in a container in my stamp room.  When my friend, Doreen visited last Fall she brought the die with her & I die cut several of them to use later.  It was the perfect size and I love the look of the stacked birthday greeting.  I did add one leaf & a few berries from another stamp set (Avery Elle Holiday Bouquet) that I tucked in under the main floral image.  I added Wink of Stella to the flowers and berries but the picture doesn't really show the shimmery shine!  I love this card and thank you to Cathy Z. for the inspiration.  Her clean & simple designs are right up my alley!  
Saturday, July 29, 2017

Do More Of What Makes You Happy!

Woo Hoo, look at me I used another wood stamp today!  Susan, do you recognize this stamp?  I saw that they were using it at Impress a few weeks ago and it is pretty cute don't you think?  I used the Amuse Studio Brushstrokes stamp set for the background and then stamped with Onyx Versafine ink. I also added a few Nuvo drops this time!  


Friday, June 9, 2017

Home Sweet Home

I found this 12 x 12 piece of paper at my local scrap/stamp store and I wanted to make a few cards before I filed it away and forgot about it!  Yes, that happens!  I used my Hello From Iowa stamp on a few and also a stamp/die set by Sugar Pea Designs called Sweet Sentiments Home.  


I embossed the envelope with a little house - can you see it?  

Sweet Sentiments Home by Sugar Pea Designs has this cute die that coordinates with the sentiments in the set.  
Monday, May 29, 2017

Pretty Peony!

Today I'm posting cards using a very favorite stamp of mine.  It had me baffled that I had never posted any cards on my blog using this stamp.  I can tell you I have used this stamp a ton and have passed my love for it on to others - - - you know who you are!  I find that I use it mostly for Sympathy cards but it is  equally beautiful for a floral birthday or thank you card.  I bought it from Impress Cards & Crafts and it is called Pen & Ink Peony and folks let me tell you it is a beauty!  For the Sympathy cards I used Amuse Studio Seattle ink and a variety of sentiments.   
Sunday, April 2, 2017

Bunny Washi Tape

Today's post is sort of a repeat of yesterday but I wanted to share the cute Bunny washi tape that I used to cover the Hershey nuggets!  The washi tape is just the right size to wrap around the candy and so cute for your Easter treats!  I ordered the Rose Gold Foil Bunnies Washi Tape from Impress.
See the little bunny peeking out the side of the treat?  
Monday, March 27, 2017

Color Me Washi Tape

I ordered this fun new Dear Lizzy Color Me washi tape from Impress.  I love the black floral but if you want you can color it for a very fun, pretty result.  I used Tombow markers to color the washi tape and thought it turned out lovely.  The sentiment is from Papertrey Ink Think Big Favorites #6

Sunday, February 12, 2017

Happy Mail


A simple Valentine - I used an Amuse Studio sentiment from With Love stamp set along with the pretty white embossed leaf pattern from Stylized Autumn by Papertrey Ink.  The Happy Mail stamp is from Impress.  
Tuesday, December 27, 2016

So excited to see these on the Shelf!

I was pretty excited to see these cards at Target a few weeks ago.  They are similar to some that they used to sell but discontinued.  They work so nicely with the custom stamp from Impress.  The stamp is called Hello from (your city), in my case I used my state since my city name is a bit too long.  
These are the discontinued cards that Target used to sell.  They were rectangle and the newer ones are A2 size.  I love those little houses and was so happy to see them on the shelf again!  It's the little things :)  
Monday, August 22, 2016

Hello from Iowa

My friend, Doreen had the Hello from ... stamp and  I decided I had to have it as well.  It is a custom stamp from Impress if you are interested in ordering and personalizing for your own city or state.  The house cards came from Target several years ago.  
Saturday, December 28, 2013

Hand Stamped Cards!

A few of the handmade cards that I received in the mail last week.  More to come...

Thursday, July 14, 2011

For Baby

I used Martha Stewart's Double Arches punch to decorate the box.  The paper is Spring Moss by Papertrey Ink.  The brown box was purchased at Impress Rubber Stamps.  It was all about the cute presentation on this project.  I'm going to miss a baby shower next weekend so I wanted to send a gift card in style! 
I decorated the inside of the box as well.  The patterned paper is Everyday Blessings by Papertrey Ink.  I made my favorite gift card holder using Papertrey Ink stamps & papers.  Go to this post for directions on making the gift card holders.  The rattle & shower words are from Baby Button Bits
I still love this onsie and have used it over & over & over!  Bitty Baby Blessings by Papertrey Ink.
The gift card easily slips into the slot & you still have room to write your personal message. 
Saturday, May 7, 2011

Hats off to the Grads!

We have several graduates both High School & College this year so I made a couple of cards. 

Supplies: 
Cardstock:  Papertrey Ink Royal Velvet & Pure Poppy
Stamps:  Graduate Cap from ConGRADulations by a•muse studio
Dotted Flourish - Impress Rubber Stamps
Words - Papertrey Ink For the Graduate
Other: Martha Stewart Border Punch
Monday, January 3, 2011

Happy New Year Everyone!


Thursday, September 16, 2010

Cool Background

This was my inspiration for the cards that I made.  I copied the idea but used the stamps & inks that I already have in my collection.  Here is the link to the Hero Arts card called Flying By To Say Hi to get all the details.  I really think the reason I liked this card was for the beautiful background colors.  While it was a bit of work to mask off the area I really liked how they turned out & I was able to use some of my Distress Dye Ink Pads. 

I used Tim Holtz Distress Dye Inks - Wild Honey, Rusty Hinge & Dried Marigold for the background & my blending tool to apply the ink to the paper.  I used Amber Clay Chalk Ink for the moon.  Versafine Black ink for the branch, spider & the words. 

STAMPS USED: 
Large Solid Dot by Impress Rubber Stamps
Scary Branch by Impress Rubber Stamps
Happy Halloween Words by AMuse Art Stamps
Halloween Wishes Words by Hero Arts Happy Halloween CL353
Saturday, May 8, 2010

Stamp #4 - Lantern

Stamp #4 that I used from the $1.00 Michael's bin!!  The lantern turned out kind of cute hanging from this branch by Impress & I added a few flowers.  The Hospitality words are by AMuse.